I hate Apple. If you’re reading this, you likely do too. You see, I’m a humble web developer building simple web apps. That’s what I was doing when Apple came along and added in some complications. All I wanted to do was debug one app and find out why so many features were broken for iOS users. On a computer, this is as simple as pressing F12 to open the developer tools in my browser. For Android devices, it’s slightly more complicated but still easy enough with Firefox and Chrome. To debug a website on an iOS device from any computer that is not an Apple device is incredibly painful.
Apple’s suggestion is to “jUsT bUy A mAcBoOk.” And sure, that’s simple enough but I shouldn’t have to spend $1,000 to ensure a hobby project looks good on the most popular mobile operating system in the United States. I shouldn’t even have to spend $80/user/year to buy a product specifically for testing web sites on iOS. Apple is a $3 trillion dollar company; I think they can afford to put a few developers on improving this experience.
But since they haven’t (and probably won’t), I dedicated a day to figuring it out. And since I already figured it out, you don’t have to!
⚠️ Frustration Warning ⚠️
Buckle up, because this gets convoluted. I hope you enjoy hanging out in your terminal. And if you don’t like compiling projects from source, you’re going to have a bad time. This process relies on an open source project that relies on another open source project that relies on yet another open source library. Ensure any children or folks sensitive to swear words are out of ear-shot before attempting.
ios-safari-remote-debug-kit
To begin, this whole process relies heavily on HimbeersaftLP/ios-safari-remote-debug-kit. It requires that you have Python, PHP, or Node.JS http-server installed. You’ll also need a Chromium or WebKit based browser. Firefox isn’t going to work here. And finally, you’ll notice that it depends on another project by Google called ios-webkit-debug-proxy.
ios-webkit-debug-proxy
Before we can install ios-safari-remote-debug-kit, we’ll need to install ios-webkit-debug-proxy. On MacOS or Windows, this is actually really easy. But we’re doing this on Linux because we love pain 🇺🇸 FREEDOM 🇺🇸!!!
To begin installing this project, we’ll need to install all of its dependencies as well. We can start that by running the following in our Debian/Ubuntu Linux based-distribution’s terminal:
sudo apt-get install autoconf automake libusb-dev libusb-1.0-0-dev libplist-dev libtool libssl-devAnd we’re done!
Just kidding, but wouldn’t that be nice? Next, we’ll need to compile five projects from the libimobiledevice library directly from source.
libimobiledevice
To get ios-webkit-debug-proxy working, we’ll need the following dependencies from libimobiledevice. These all need to be compiled from source, in the following order:
- libimobiledevice/libplist
- libimobiledevice/libimobiledevice-glue
- libimobiledevice/libusbmuxd
- libimobiledevice/libimobiledevice
- libimobiledevice/usbmuxd
The good news here is that the process for compiling each is mostly the same and quite straightforward. The bad news is that you’ll have to do the following steps with each project, so five times in total.
- Install dependecies (Sensing the pattern yet?)
- Clone the repository
- Run
./autogen.sh - Run
make - Run
sudo make install
1 – Install Dependencies
Each of these projects has their own dependencies as well to install. But because they tend to depend on each other, we can’t knock out all of these installs in one go. Instead, we’ll need to run each of the installs before compiling, and then move on to the next project.
- libimobiledevice/libplist
sudo apt-get install build-essential checkinstall git autoconf automake libtool-bin - libimobiledevice/libimobiledevice-glue
sudo apt-get install pkg-config libplist-dev - libimobiledevice/libusbmuxd
sudo apt-get install libimobiledevice-glue-dev usbmuxd - libimobiledevice/libimobiledevice
sudo apt-get install libusbmuxd-dev libssl-dev - libimobiledevice/usbmuxd
sudo apt-get install libimobiledevice-dev libusb-1.0-0-dev udev systemd
Note: I removed all of the duplicate packages shown in each installation command. I’d encourage you to visit the README of each of the projects to see them for yourself.
Remember, these packages need to be compiled and installed in listed order so you’ll need to refer back to this section for each one.
2 – Clone the repository
For each of these projects, we can clone them into their own directory. To prevent fighting with permissions, I opted to install them under ~/.local/src/ of my user directory. This has the added benefit of not requiring sudo for every single command and each time I’d like to debug something on iOS. I installed almost everything under the project maintainer name, and then under each project name. By the end of it all, I had a directory structure like so:
~/.local/src/
  google/
    ios-webkit-debug-proxy/
  ios-safari-remote-debug-kit/
  libimobiledevice/
    libimobiledevice/
    libimobiledevice-glue/
    libplist/
    libusbmuxd/
    usbmuxd/
In essence, each of these projects will be cloned from the GitHub repository page (git clone PROJECT_URL PROJECT_DIR).
3, 4, and 5 – Compiling
Believe it or not, compiling from source is very simple for each of these projects. I didn’t require any custom prefixes or anything fancy but your mileage may vary depending on your distribution. Compiling the source code into a usable binary for each of the libimobiledevice projects, follows this command structure:
cd DIR_NAME
./autogen.sh
make
sudo make install
And that should be it!
Back to ios-webkit-debug-proxy
Having compiled everything from the five required libimobiledevice libraries, we can come back to the installation for ios-webkit-debug-proxy. Again, this process is actually quite simple and follows the same format the dependencies we just installed followed (install dependencies, git clone, and compile):
git clone https://github.com/google/ios-webkit-debug-proxy.git ~/.local/src/google/ios-webkit-debug-proxy/
cd ~/.local/src/google/ios-webkit-debug-proxy
./autogen.sh
make
sudo make install
To verify that everything is now working correctly, you should be able to plug in an iOS device, run idevice_id -l and receive a unique identifier for that device!
However, after having compiled all six of these projects from source, I received an error when attempting to list the iOS device plugged into my computer with idevice_id -l:
$ idevice_id -l
ERROR: Unable to retrieve device list!
I also noticed that I received an error from the usbmuxd command:
$ usbmuxd
usbmuxd: error while loading shared libraries: libimobiledevice-glue-1.0.so.0: cannot open shared object file: No such file or directory
To remedy this issue, I simply needed to run
sudo ldconfig
as pointed out on this issue in the libimobiledevice/usbmuxd repo and both commands worked. I could now see my iOS device listed!
Return to ios-safari-remote-debug-kit
Now that we’ve installed ios-webkit-debug-proxy and all of its dependencies, we should be able to continue with ios-safari-remote-debug.
Again, clone the repository into a directory under ~/.local/src/. Once you’ve done that, permissions of generate.sh will need to be adjusted so that it may execute:
git clone https://github.com/HimbeersaftLP/ios-safari-remote-debug-kit ~/.local/src/ios-webkit-debug-proxy/

chmod +x generate.sh

./generate.sh

chmod +x start.sh

./start.sh
Once done, you should be able to start the proxy server by running ./start.sh; however, I ran into two issues when I attempted it.
The first issue I encountered was the bash script having an unbound variable. Essentially, the script was expecting an argument to be passed but never receiving one. The developer points out that this can easily be worked around by adding any text after calling the script. For example, ./start.sh banana would bypass this issue. I’m going to call this a non-issue though because before I could even finish this write-up, the developer had already merged a pull request that addressed this very problem. Props to that contributor and the maintainer for such a quick turnaround.
The second issue I ran into was that start.sh was attempting to run the wrong command. The script was looking for ios-webkit-debug-proxy (the name of the Google project we installed earlier) but to actually start that proxy, the command is ios_webkit_debug_proxy. Of course, I noticed how simple a fix this would be so I created my own pull request. And wouldn’t you know it, the developer has already merged it so again, it’s a non-issue for you!
Actually Debugging
Do you ever start on a project and fall down one of those dependency rabbit holes where you’re just installing dependency after dependency and you forget why you started in the first place?
Yeah, me either.
In any case, you probably want to get back to work and begin debugging your web app in Safari on an iOS device… from your Linux computer. You just need to:
- plug-in an iOS device to said Linux computer
- enable the Web Inspector of your iOS device in Settings > Safari > Advanced
- open the web page you’d like to debug
- run
start.sh - open a Chromium/WebKit based browser on your computer, and navigate to http://localhost:8080/Main.html?ws=localhost:9222/devtools/page/1.
You should then be able to view network requests, console.log() calls, and adjust the Web Storage directly on your device, all without ever having to purchase a MacBook!
Credits
It’s always fun to dunk on Apple but credit needs to go to the developers of the open source projects that make this possible. The documentation in each of the aforementioned projects is fantastic to the point where it can be deciphered even by mere mortals such as I. To show the developers of these projects some love, go give a star to their GitHub repositories. In particular, give a well deserved ⭐ to ios-safari-remote-debug-kit.
The developer of that project, Himbeer, documented the process of bringing back remote debugging to iOS so give that a read too! Similarly, I put this post together as a way of documenting my process and in hopes that others may find and enjoy it so if you enjoyed it or learned something, share it.
Here’s to documenting our trials and tribulations so others may learn from them 🍻!
Bonus: Apple Haters Unite!
I know for a fact I’m not alone in my displeasure with Apple when it comes to web development. When I was learning how to monitor network traffic for Android apps, I found myself poking around in the APIs for various apps, including one used to manage digital photo frames. In that app, I stumbled across a hilariously named variable fuckingapple in the network requests. See it for yourself!
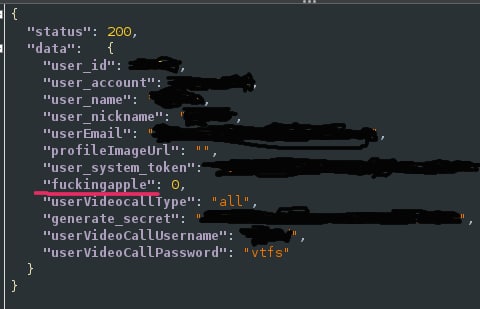
snake_case or camelCase, but is nice to know that I’m not alone in my frustrations with Apple 🤣
5 replies on “Remote Debugging Web Apps on iOS from Linux”
Hey thaks for the post!! Really appreciate it :) Just a question: with you line “git clone https://github.com/HimbeersaftLP/ios-safari-remote-debug-kit ~/.local/src/ios-webkit-debut-proxy/” i guess you meant “ios-safari-remote-debug-kit” as the target folder no? Best
Whoa, good catch! Yes, you are correct. The article has been updated to reflect this. Thanks for the feedback!
nice write up for a very annoying problem, all worked nicely although it’s pretty pathetic that this doesn’t just work out of the box. and yes i do also hate apple largely because of the brittle spirit energy they emit in cases like this.
Great work! I made docker image according your instructions
https://hub.docker.com/r/bortomar/ios-webkit-debug-proxy
That’s great! Thank you so much for sharing.